Tuesday, November 17, 2015

Scrap Swap

Here's a cool idea for your sewing group:

Recently our guild (MadModQuiltGuild) did a scrap swap. We each brought in a gallon ziploc bag of scraps, and swapped with a random partner. Then we had 2 months to make a project to give back to the scrap owner. 

Most of us have a ton of scraps laying around that we never seem to put a dent in, am I right? This was a fun way to use some of those up and get a surprise at the same time!

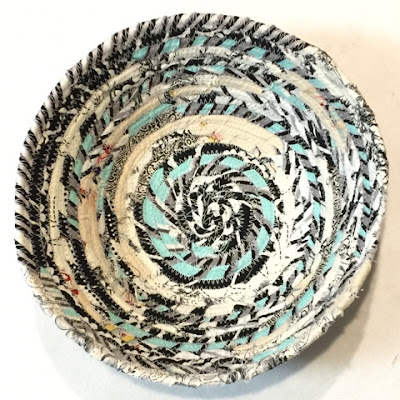
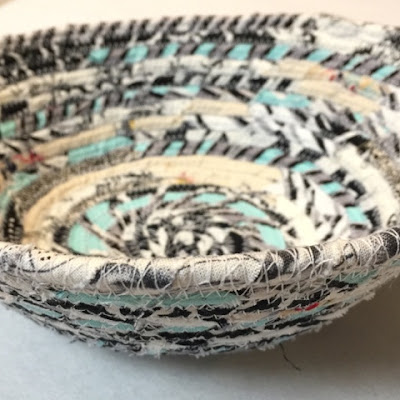
The scraps I got from my partner included all kinds of colors. I decided to pick out all the low volume, black, and one particular blue striped fabric to make a scrappy rope bowl. 

Scrappy Rope Bowl

Scrappy Rope Bowl

I wanted to make a little something else to go with it (and use up some more scraps), so I made a zip pouch and added some Modern Stitching Affair hexie templates and candy. 

Zip Pouch

I used up about half of my partner's scraps. I hope she likes what I made!

Saturday, November 14, 2015

Simply Mini Swap

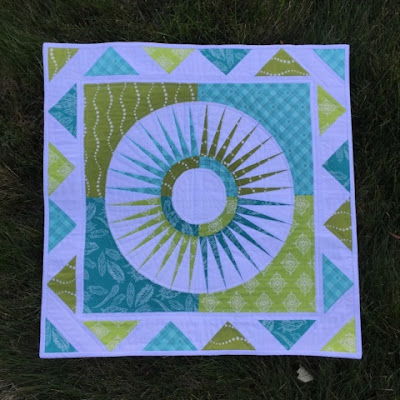
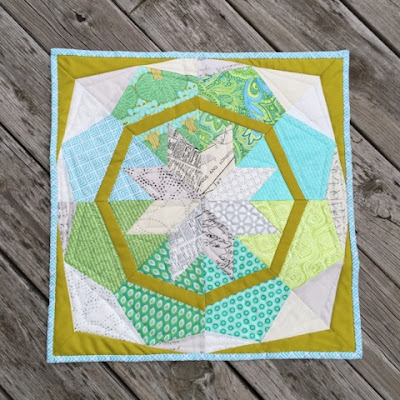
The #SimplyMiniSwap was hosted by @purplepoppyquilts, and it was meant to be simply a mini quilt - no extras. This was a really fun swap for me, because as soon as I saw my partner's mosaic, I knew exactly what I wanted to make for her. She had all blues and greens in her pictures (which are my current favorites), and she also said she likes stars. I had been wanting to make a New York Beauty for a while, so I thought this would be the perfect opportunity.

New York Beauty by Trina Peterson

This was the first time I had ever tried piecing curves, so I went hunting for some advice online. Luckily I found an awesome tutorial for piecing a New York Beauty by Kati at From The Blue Chair. Her pointers helped immensely, and the whole process was a complete success. All of the seams lined up pretty much perfectly. 

New York Beauty by Trina Peterson

This quilt was really hard to give away! It's my favorite piece that I've ever made. Every time I posted a picture of my progress on Instagram, my swap partner always commented that she liked it, even though she didn't know it was for her. I'm so glad this quilt went to her!

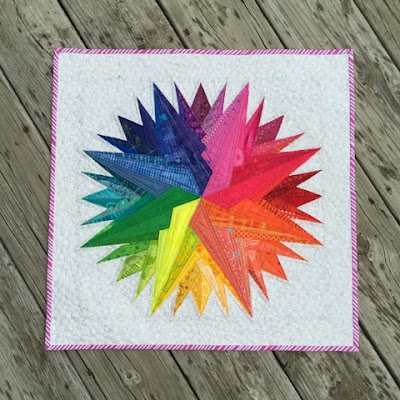
The quilt I received from my swap maker is so incredible, and I couldn't believe it when I got the package! 

Quilt by Cassandra Beaver

I had been admiring her posts on this quilt while she showed her progress on Instagram. I never dreamed it would actually be mine! Cassandra (@cassandra.beaver) designed this quilt herself, and there are 83 different fabrics! Everything about it is gorgeous, right down to the intricate quilting. I'm a very lucky partner!

Tuesday, November 10, 2015

Sew My Stash Swap

If you haven't checked out the #sewmystash2015 hashtag on Instagram, you should. And you should use it! It's great to see what people are making with what they have in their stash. I think a lot of us have a tendency to hoard fabric (Guilty!), and it's nice to be able to pull and make something without having to go purchase anything new.

The Sew My Stash Mini Swap required that you use at least 75% stash to make a mini quilt for your swap partner. I was able to use 100%! (As long as you don't count the pattern: I purchased that specifically for this swap.) 

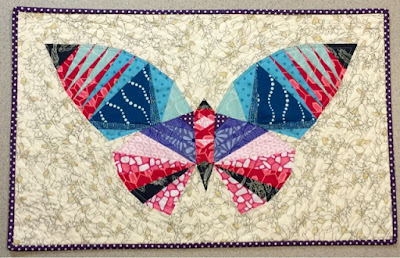
Take Wing Mini Quilt

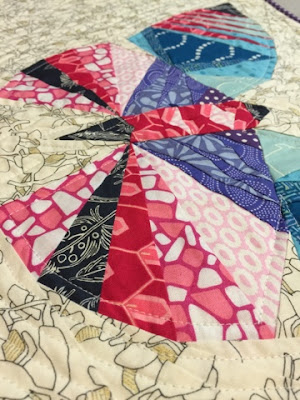
My swap partner had this pattern in her inspiration mosaic, and I've been wanting to make it, so it was easy to settle on a plan. This is the Take Wing Pattern by lillyella. It's a great pattern that allows for a lot of customization based on color choice, and it also makes a nice size mini to hang or use as a centerpiece. 

Take Wing Quilt

I was so excited when I opened the mini I received in return! Lucy (@pearhugstudio) did a great job. I love greens & blues together, low volume prints, and I really dig geometric paper piecing patterns. This will hang in my sewing space. 

Sew My Stash Mini Quilt Swap

The Sew My Stash Mini Quilt Swap was hosted by @projectleasa

Saturday, November 7, 2015

Baby Shower Gifts

I wanted to share a couple of quick baby shower gifts that I was able to stitch up the evening before they had to be shipped off! It seems I'm running late for everything these days, what with chasing around my own tiny human.

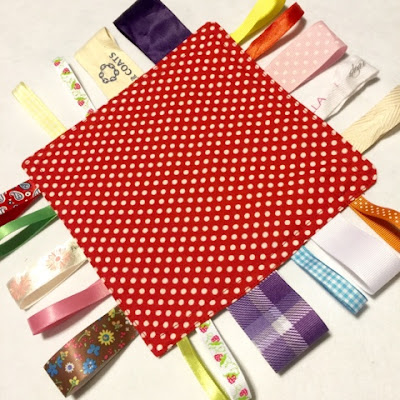
The first is a little crinkle/ribbon toy.

Crinkle Ribbon Baby Toy

All this takes is a couple squares of fabric (I made mine 8"), some small pieces of ribbon (I cut mine 5" long), and a cereal bag. It literally only took me about 10 minutes to make this toy. A friend made one for my baby shower, and my son loves it, so I thought it would be something great to do for my cousin who is about to have her first baby (girl). There is a nice tutorial for this project by Cucicucicoo. 

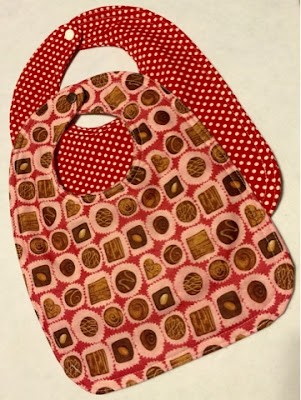
I also made a couple quick bibs with Heather Bailey's Slobber Monkey bib pattern. These are super quick to make, and I used a piece of scrap (cotton) batting in the middle of mine so they would be more absorbent.

Slobber Monkey Bibs

A couple easy handmade gifts to toss in with some other baby essentials: it's nice to be able to add something personal and handmade.

Wednesday, November 4, 2015

October Stitch Tease

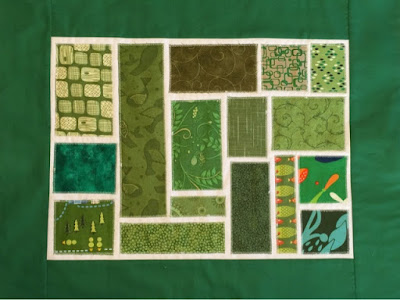
October was Jennifer's month in the Stitch Tease Bee, and she chose Bottled Rainbow blocks. These are ticker-tape blocks that are really fun to do, and they are perfect for using up those scraps. We used the tutorial by Stitched in Color. These blocks can be done using Quilt As You Go (which we did for Jennifer). Each block finishes at 16" x 20", so we only made one this month. Everyone did a different color, and I did dark green. I can't wait to see this quilt put together, and it's definitely a quilt I'm going to put on my "to do someday" list. Hopefully "someday" I'll find the time.

Bottled Rainbow Quilt Block

Friday, October 9, 2015

Teal Mini Swap

Confession: I got sucked into swaps as of late. It is highly addictive. Buyer beware.

The month of September brought the Teal Mini Swap. This is a fun event organized by Beth Helfter of EvaPaige Quilt Designs to raise awareness and money for ovarian cancer research. Teal ribbons represent ovarian cancer (hence the name). 

Each participant paid $15, most of which went to the Ovarian Cancer Research Fund. Everyone received a piece of the challenge fabric, which was donated by Blank Fabrics.

We had a month to make a mini quilt or a mug rug for our swap partner, and we had to somehow incorporate the challenge fabric. Here is the mug rug I made for my partner, Jenny.


I happened to have a little kit hanging around with this pattern and fabric from Sew Lux. I thought this was the perfect time to use it, so I just swapped out the background fabric in the kit for the challenge fabric. It was really fun to make! 

I love the mug rug I received from my partner. She called it tumbling spools, and it's even quilted to look like thread. It lives right next to my sewing machine. Thanks Jenny!

Mug Rug

The Teal Mini Swap is an annual event, so join the Facebook group. There is also an informational page here. I hope to see you there next year! 

Sunday, October 4, 2015

September Stitch Tease

Hello! It's been too long...

I have only one excuse, and I think it's rather spectacular: Mr. Sexy Pants and I welcomed our own tiny human into the world in May! Needless to say, blogging has not been high on the priority list these past four months. Now it's time to play a little catch up. 

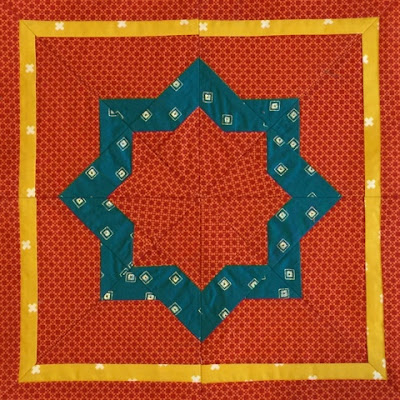
September marked the kick off of a new round of the Stitch Tease BeeFirst up was Nicky from the UK. She gave us an awesome color palette and asked for any blocks inspired by Islamic art. She provided a great Pinterest board for ideas. Here are the fabrics I pulled based on Nicky's beautiful color palette, but I only used a few of them. 

Fabric

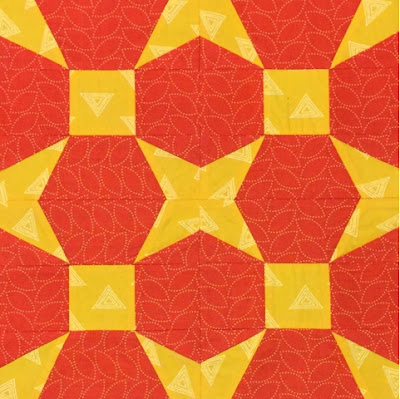
I was really nervous to make these blocks; typically I like more direction and less freedom with bee blocks. In these cases I get nervous that they might not like what I make. As it happens, I'm quite happy with how mine turned out this time around. These are two paper piecing patterns that I drafted myself. 

Tile Star Block

Vertigo Block

I love how a very simple geometric block (such as the one that makes up one-quarter of this 2nd block for Nicky) can make such interesting designs when multiplied and placed together. I'm anxious to see this one done with more colors  to see how different shapes within the block can be emphasized. 

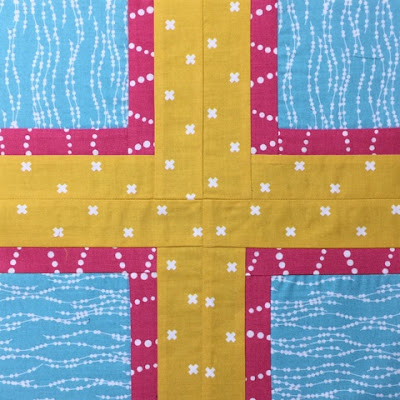
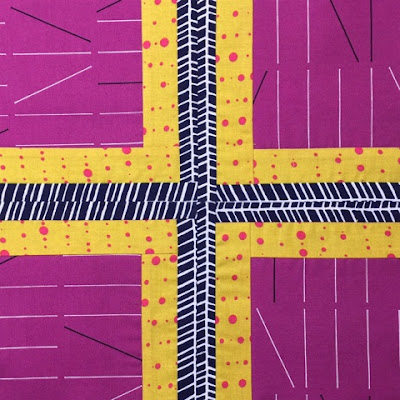
In the spirit of catching up, I must also include the blocks I made for our Stitch Tease Bee founder, Di back in June. She asked for intersection blocks made from a tutorial by Film in the Fridge. These were fun and fast to make, and I also loved her color palette. This will be a gorgeous quilt. 

Intersection Block - Film in the Fridge

Intersection Block - Film in the Fridge

We took a couple months off this summer, which was especially convenient for me after having the babe. I'm very excited that we've started up again, though. I look forward to making these blocks every month. 

Friday, May 15, 2015

May Stitch Tease Blocks

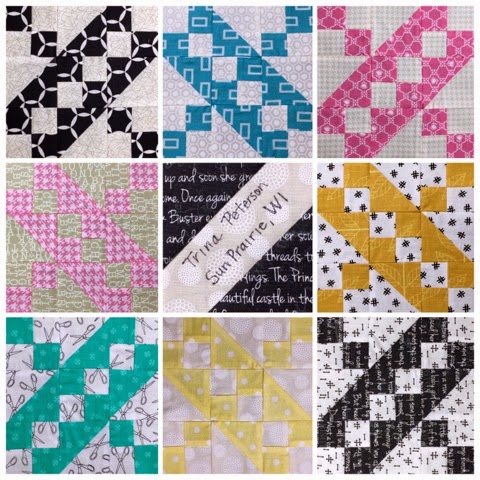
The month of May belongs to Valerie in our International Stitch Tease Quilting Bee. She chose a fun block that I've never made before: the Jacob's Ladder. She wanted eight 6" finished blocks with low volume backgrounds and a beautiful pallet of black, pink, teal, and yellow focus fabrics. She told us we could do multiple blocks in the same fabrics, but part of the fun for me is picking out and working with different fabrics from my stash, so I chose to make 8 unique blocks. We used a tutorial from Generations Quilt Patterns as a reference for these blocks. 

May Stitch Tease Blocks

A couple of my blocks don't have the best contrast, as you can see. That is a skill I need to improve upon in my quilting. It's nice to see all the blocks together like this, because when I look at them individually I often don't notice the value as much. I love quilts that use value more than anything else to create the pattern. It amazes me how some people have a knack for putting those together, and I hope to be able to do that myself at some point.

We also made siggy blocks using the PS I Quilt method. Unfortunately I have horrible handwriting, but alas - life goes on. I can handle being known as the gal with the wretched penmanship. There are worse things in the world, eh?

I also wanted to take a moment to share my obsession with Bloc Loc Rulers and my rotating cutting mat. I try a little bit not to be gadget dependent (although I'm not fooling anyone other than myself). In all seriousness, though, these tools have greatly improved the quality of my half square triangles and cut the time in half or better. They are amazing. 

Bloc Loc Ruler

My HSTs are darn near perfect. Every. Stinking. Time. They also make Bloc Locs for flying geese, and I definitely see a set of those in my future. 

Happy quilting! 

Wednesday, April 29, 2015

April Stitch Tease Blocks

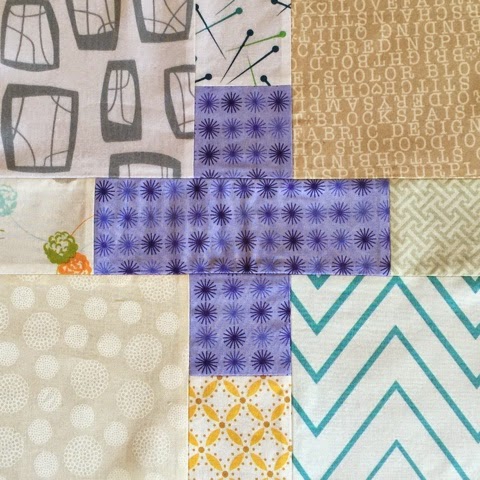
This month's Stitch Tease Bee Queen is my friend, Cindy. She went easy on us and gave us a quick, fun block with easy color instructions. We were to use any bright color for the plus center and low volume prints for the background. This is going to be an awesome quilt!

Low Volume Plus Block

Plus Quilt Block

She also requested that we each make a siggy block. I didn't take a picture of mine (my handwriting is wretched), but we made the type that you can find in this tutorial from PS I Quilt. These look great incorporated into the backing of a quilt, and they're a fun way to commemorate all of the different people who contributed to a bee quilt or other collaborative effort.

Happy Quilting!

Monday, April 27, 2015

The 1 Hour Basket

There's a basket making craze happening lately on Instagram! Tons of pics of the 1 Hour Basket are popping up all the time. This is a fun, quick, and best of all FREE pattern by Hearts and Bees that you can download from Craftsy.

1 Hour Basket

The nesting bug is really biting the past few days, and I decided that I needed something cute to hold all the bottle parts for the tiny human. Organization is key, after all. To what? I'm not exactly sure. 

Hour Basket

So I finally jumped on the bandwagon and tried out one of these baskets. It did in fact only take me 54 minutes from start to finish - including pressing and cutting. 

1 Hour Basket by Hearts and Bees

I also added a couple of my own minor touches. I wanted the handles to be a little stiffer than what I've seen on the Instagram pics, so I added a layer of Pellon's Shape Flex to those. I also made them an inch shorter, and I really like how they turned out. 

The only other tweak I made was a little extra top-stitching. I really enjoy the look of a double top-stitched seam, so I did that to both sides of the handles and around the top of the basket. 

Hearts and Bees Hour Basket

This is a great pattern, and I think I'll probably make one or two more of these for some odds and ends in the nursery. 

Hour Basket

I tried to get a picture of Keef in the basket, but she was having none of it. She is not a team player. :)

Tuesday, April 14, 2015

Bucket Hats

This past weekend we had a MadModQuiltGuild sew day at Bungalow Quilting & Yarn in Ripon, WI. This is such an awesome quilt shop. It's not a huge place, but it is chock full of awesome modern fabrics and patterns. I feel like a 5 year old in a candy shop every time I walk in there. It's almost a bit overwhelming, but in a really good way!

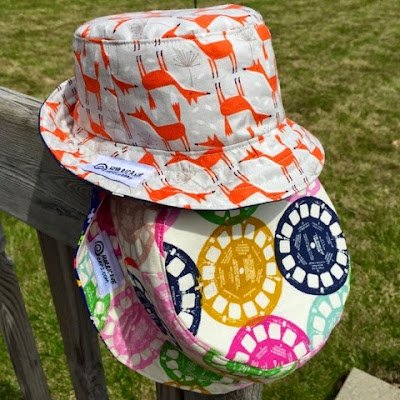
While I was there, I noticed some really cute Bucket Hat samples that were made up in great fabrics. I decided that I had to make a couple for myself and the tiny human for our days out strolling this summer. 

Kitsch Bitsch Bucket Hat

They're not perfect, but hey - first try, right? They're still pretty rad. Also, they're  reversible. 

Oliver + S Bucket Hat

Both of the hats were made from free online patterns. The adult size pattern is by Kitsch Bitsch, and you can get it from their website after submitting your email address. The kid size pattern is from Oliver + S: no email required.


Bucket Hats

I used Pellon's 911FF Fusible Featherweight non-woven interfacing on both layers of fabric (quilting cotton) for my hats, although the patterns didn't call for this. I like how they turned out. The interfacing helps them hold their shape, but they are still soft, comfy, and able to be manipulated. 

Bucket Hat

Moms are supposed to look a little silly sometimes, right?

The weather is already beautiful here in Wisconsin. We got lucky with an early spring this year. I can't wait to get the boy out in his hat and stroller - hopefully by the end of May if he arrives in a timely fashion. 

Friday, April 3, 2015

Double Pocket Pouch

There's a new and exciting pattern out by Aneela Hoey called the Double Pocket Pouch.  When I saw the pictures start to pop up on Instagram earlier this week, I knew I had to make one straight away. I managed to get started on the cutting last night, and I finished the pouch this morning.

Double Pocket Pouch - Exterior


The finished size of the pouch is about 5.5" x 9" when it's closed and 11" x 9" open. It's perfect for travel sewing, cosmetics, etc.

Double Pocket Pouch - Interior


The fabric & notion requirements are all fairly straight forward. I actually had everything on hand in my workshop. I love the interfacing she suggests (Shape-Flex by Pellon, and Fusible Fleece). I use those two for most of my bag and pouch projects.

There was one section of the pattern with which I struggled. She describes an interesting way to make the bias binding. It looks really amazing in the illustration, but I just could not figure it out! Perhaps it was because I was trying to get everything cut & prepped at 11 pm. I ended up cutting and prepping my binding in the traditional manner, but I'm hoping to give Aneela's way another go for a 2nd pouch - ideally at a more reasonable time of the day.

Overall, I thought this was a really cute project. It would make a great gift for any sewist or gal pal who travels.

Sunday, March 29, 2015

March Stitch Tease Blocks

For the past year I've had the pleasure of being a member of an international quilting bee called Stitch Tease. The bee is comprised of 12 women from four countries, and we all get a month to be Queen. When it's our turn, we decide what type of quilt block we want everyone to make for us, so we each end up with a quilt made by 12 different gals from around the world. This is the first and only bee to which I've ever belonged, and I was very honored to be invited. It's been so much fun, but I can't believe I haven't posted the blocks I've been making!

Stitch Tease Bee Blocks for Susan (March)

March was Susan's month to be Queen. She chose an improv block that starts out with a fussy cut and incorporates white and colored strips around it in a log cabin-ish style. The block is based on a quilt by Plum and June. These blocks were really fun to make. Susan wanted different sized blocks in multiples of 6. I made one 12" block, one 12" x 6" block, and two 6" blocks. I left them oversized (untrimmed) so that Susan could trim them down exactly how she wants. She mentioned that wonky was good, so I did my best to make some wonky strips, but I'm still trying to get better at that.

Stitch Tease Bee March Blocks

The birdie block is my favorite. It's hard to part with that one, but luckily I still have a nice big piece of that fabric! :)

Friday, March 13, 2015

Party Favors

Tomorrow is my baby shower: hosted by my friend, Wendy. Without doubt, she throws the best parties I've ever attended, so I'm pretty stoked.

She has turned down all of my offers to help in any way, but I demanded to do something. So I decided to make some party favors to thank the guests.

I came across these cute chocolate covered pretzel rods on Pinterest and decided that they were a must. Salty pretzels and chocolate all in one little adorable package? "Yes, please" says the pregnant lady.

It's a Boy Pretzels

While making these sticks of deliciousness, I discovered that professional chocolatier is probably not a career I should pursue. Working with chocolate is kind of hard!! I burned/seized 2 batches of chocolate. Ouch. Eventually I figured out enough to complete the project, though, and the result is pretty good. I used white chocolate chips to dip the white pretzels, and then I used Wilton Candy Melts for the blue drizzle. After using the candy melts and discovering how much easier they are to work with than chocolate chips, I bought them in cocoa flavor for the regular chocolate pretzels. They taste great and are truly much easier to melt and dip.

I also used Wilton's Disposable Candy Decorating Bags. They make drizzling so easy. You just put the melts inside, twist the end (I secured it with elastic), pop them in the microwave, and clip the tip. When you're done, there is no messy cleanup; you just toss them in the trash.

Wilton even makes special bags for pretzel rods!! Am I starting to sound like an infomercial? These are super cool, and they even come with the silver twist ties. I found all of these Wilton products at Joann Fabrics.

I also made candles, because I remembered the Blue Ball Jars that came out recently, and I knew I had to use those for something. This was my first attempt at candle making, and alas - it was also a bit of a struggle. 

I used this tutorial, but failed at first with the scenting process. The first two kinds of oil I tried did not work very well. Those candles hardly smell at all. Then I discovered Candle Scents by CandleScience on Amazon. I ordered a sampler pack of these, and they worked great. I also ordered my wicks and soy wax through Amazon.

Party Favors

This is what every guest will receive at the shower. I feel very lucky to have friends and family who are willing to celebrate and support me during this life changing event. I hope they like their thank you party favors!

Monday, March 2, 2015

Two Baby Quilts

Hello Friends!

It's been a while, but this blog has not been permanently abandoned. I'm back to show you a couple of recently finished baby quilts.

I was the lucky winner of the Modern Baby: Easy, Fresh and Fun Quilt Designs book at Sewing Summit in 2013. I was extra excited to win this book, because my friend, Dana, from Old Red Barn Co. has a quilt on the cover that I had been wanting to make. It took a while for me to actually make the quilt, however, because there weren't any new babies around. This year there are two pretty important ones.

My cousin had her first baby in January. I shipped this quilt to her in Maine and had it hand-delivered the night before her son was born.

Taylor's Quilt


Mr. Sexy Pants and I are expecting our first baby in May - also a boy (Hooray!). Sexy Pants is an avid fisherman, and when he saw my cousin's quilt, he asked (rather jealously) if I would be making one for our son as well. Of course I already had one in the works. I've never made two of the same quilt before, but I just couldn't help myself. I love this pattern. The one I made for us has a different background color, and I used different scraps for the bubbles, so the quilts are not identical.

Our Quilt


I used one of my favorite IKEA fabrics for the backing on both quilts. It's a fun print, especially for kids. I will admit to using it on at least one of my own quilts as well. I also used the same binding for both quilts, because I liked it so much.

Backing Fabric


The fish and bubbles are done with raw-edge appliqué, so when the quilts are washed the edges of those pieces will fray. Hopefully the babies will enjoy playing with those.

I quilted both quilts on my Grace Frame and Juki combo with the same motif: wavy lines that circle around and outline the appliquéd pieces.

Free-Motion Quilting


The quilts finished at about 33" x 43".

There are a lot of other great patterns in the Modern Baby Book, including a beautiful paper-pieced pattern by Carolyn Friedlander that I hope to make at some point for a wall quilt, and also a fun and very modern pattern that I love by Lindsay Rhodes.

Happy quilting :)