Friday, January 29, 2016

November Stitch Tease

I'm a little behind on posting about my Stitch Tease Bee Blocks, but I definitely didn't want to miss showing these ones. Hadley chose Anna Maria Horner feathers for her bee blocks, and they are so gorgeous!

Anna Maria Horner AMH Feathers

These blocks weren't the easiest I've ever made, and some of my bee mates mentioned having trouble getting the correct size in the end. I was very careful to print the templates at 100% and cut out each piece with caution! I chose to paper piece the feather portion, and that made things very manageable. The blocks ended up coming out to the correct size, but I admit to taking it very slowly with these ones. The pieces (templates) are not normal rectangles, so lining up the edges takes a little patience. 

Overall, though, these blocks are definitely worth the effort. They're so beautiful. I can't wait to see Hadley's finished quilt. 

Tuesday, January 26, 2016

Hop, Skip, Jump Quilt

I am filled with joy to finally have this quilt finished!!

Hop, Skip, Jump Quilt

 This was the 2013 Block of the Month hosted by Sew Lux Fabric. I rarely choose kits, but they were offering PB&J with this BOM, so I signed up. I love this fabric line from Basic Grey for Moda. It's one of my favorites.

I chose to put my blocks on point to make the quilt a little larger. It finished at about 48" x 65". It's a good size couch throw, and I've been enjoying cuddling up with my son and this quilt.

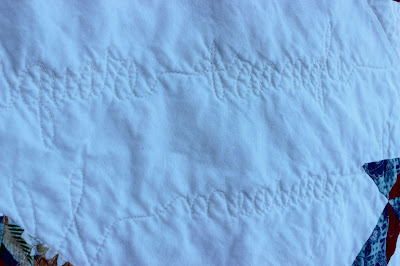
I knew I was going to keep this quilt (because I love the fabric), so I seized the opportunity to go a little crazy with the free motion quilting and get in some practice trying something new. I did random groups of vertical figure eights on horizontal lines across the quilt, and I worked in a whole bunch of quilting and sewing terms. It was fun to write these words out on my quilt, and I was actually surprised at how legible they ended up being.

Free Motion Quilting

 I quilted this one on my Juki 2010Q and Grace Frame with Signature thread and Pellon Nature's Touch 100% Cotton Batting. The backing is a vintage sheet. I love the softness from those broken-in sheets. Every time I find a good one at the thrift store, I count it as a huge win (for the comfort, price, and opportunity for a long new life). You can't beat a $1.99 quilt back, eh?

Free Motion Quilting

I think almost every quilter makes the following statement almost every year, but seriously: I think this is the year of the UFOs and stash sewing for me. Since the new year, I've completed this quilt and finished two quilt tops with stash-only fabric. I've also joined in the #2016fal fun by pledging to finish 7 UFOs in the first quarter. We'll see how close I come to that goal, but I'm really working hard on it.

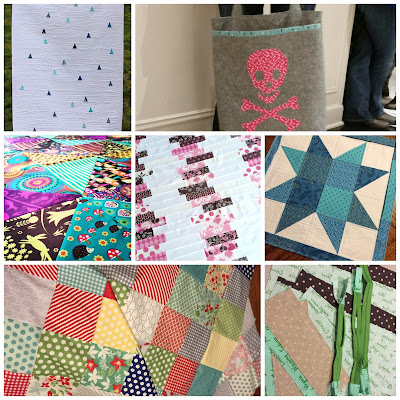
Here's my finish-along goal collage:

Finish-along 2016


Wish me luck!

Thanks for stopping by, and happy stitching!  :)


Saturday, January 16, 2016

Slopes: a Tutorial

One of the Modern Quilt Guild Quilt Con challenges this year was to use a Darlene Zimmerman triangle template to make an original quilt design. I signed up for the challenge and got the 45 degree (2.5") template in the mail, and this is what I came up with.

Slopes Quilt

I named it "Slopes", because it reminds me of a ski hill. Please ignore the sub-par quilting; I'm still a novice free-motion-quilter. But hey! At least I'm trying, am I right?! 

My goal was to make a simple quilt that would make a fun design for kids. I thought these small bits of printed fabric strewn across a solid quilt would be fun for a kid to explore. Although my choice of white might not be ideal for kids, this quilt design could be made up in any color. I just had a lot of white kicking around, and I thought it would look great with some blue scraps. Personally, I'm OK with my son getting stains all over it as long as he enjoys it.

The finished Slopes quilt measures about 42" x 60", and here's how you do it:

1. Cut 30 (2.5" x width of fabric) strips from your solid. 

2. Use your triangle template to cut 30 triangles from print scraps.


3. Lay out your strips and use your template to cut out one triangle from each strip in random spots. Replace each solid triangle you just removed with a print triangle, and piece it (sew) in place.


4. Sew your strips together lengthwise: 1 strip = 1 row. 30 rows total with one triangle randomly placed in each. 

5. VoilĂ ! You're done with the top! Now just quilt and bind as desired.  

Triangle Template

This quilt is so easy and fast, and it would make a great baby gift. 

I think it would also make a fun Jelly Roll quilt. You could reverse the pattern to use prints for the strips and solid triangles. 

You can get an acrylic triangle template like mine here. Or you can make your own with some cardboard by drawing a 2.5" tall triangle with two 45 degree corners on the bottom (use the 45 degree line on your quilting ruler). 

If you decide to make your own Slopes quilt, I'd love to see it! Tag me on Instagram or send me a pic!