A few years ago I did a Log Cabin Pincushion Tutorial. I like to make these little pinnies to give as bonus gifts with swaps, bee blocks, at sew days, etc. It's a quick project, and it's a great way to use up tiny scraps.
Project Quilting Challenge 9.6 this week is "SCRAPtastic". I'm running low on my stash of pin cushions, so I decided to make a new rainbow batch. This time around I decided to use muslin as a foundation to make the process quicker and easier (less trimming and fuss this way). Here's another quick tutorial on how to make this version of my scrappy log cabin pincushions.
Supplies:
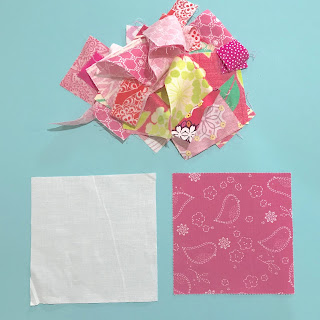
One 5" x 5" piece of muslin or white/cream fabric for the foundation.
One 5" x 5" piece of fabric for bottom.
A bunch of small scraps.
Poly-Fil
You'll also need general sewing tools & notions such as:
Sewing Machine
Iron
Thread
Scissors
Quilting Ruler
Rotary Cutter
Hand-sewing needle
Pins
Finished size after stuffing: approximately 4" x 4"
*Note: I like to roughly trim my scraps into square/rectangular shapes for this method. The pieces and seam allowance don't have to be perfect. That's the beauty of using the foundation.
Step 1:
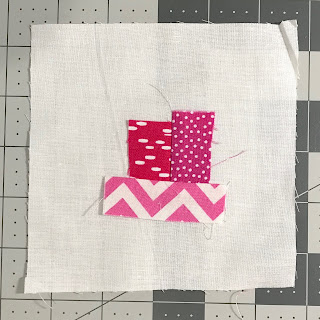
Select two similarly sized small scraps. Place them right sides together, aligning the raw edges on one side, onto the foundation near the center. Stitch along that lined-up raw edge with 1/4" seam allowance.
Step 2:
Turn & Press.
Step 3:
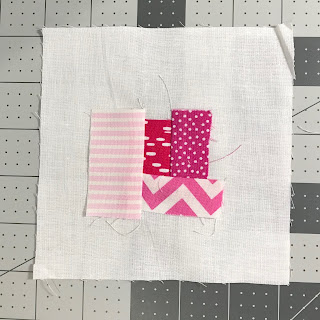
Working clockwise (or counterclockwise if you prefer), select another scrap that is approximately the length of the first two after they have been stitched together and pressed. Place the third scrap right sides together, perpendicular to the first seam and line up the raw edges along one side. Stitch. Turn & Press.
Step 4:
Continue in this manner until you have worked all the way around and covered the entire foundation. It's OK to go over the edges of the foundation.
Step 5:
Trim back down to 5" x 5".
Step 6:
Place the log cabin rights sides together with a 5" x 5" piece of fabric for the bottom. Stitch around all four sides, leaving a small opening in the center of one side for turning. Clip the corners.
Step 7:
Turn right sides out through the opening. Gently poke out the corners with a turning tool (knitting needle, chopstick, etc). Fold in the seam allowance at the opening. Press.
Fill with Poly-Fill.
Step 9:
Hand-stitch the opening closed with a slip stitch (ladder stitch) for an invisible seam.
Hooray! You're done! Tag me on Instagram @trina_peterson. I'd love to see your awesome Pinnie. :)


No comments:
Post a Comment